You’re just about to leave for work, your coffee steaming and car keys jingling, when the unexpected happens: a stubborn garage door refusing to open due to a faulty spring. Envisaging hefty repair costs can make your heart sink, but what if you could tend to it yourself? This comprehensive DIY guide empowers you with the necessary knowledge to fix that pesky garage door spring without draining your wallet. Skip the service call, grab those handy tools, and let’s dive right into every homeowner’s money-saving manual!
Understanding Garage Door Spring Mechanics
Before attempting any repairs on your garage door spring, it is crucial to have a basic understanding of its mechanics. The garage door spring plays a pivotal role in balancing the weight of the door, making it easier to open and close. There are two common types of garage door springs: torsion springs and extension springs.
Understanding which type of spring your garage door has is essential before proceeding with any repairs or replacements. It will ensure that you have the necessary tools, techniques, and expertise needed to complete the task successfully.
Identifying Your Garage Door Spring Type
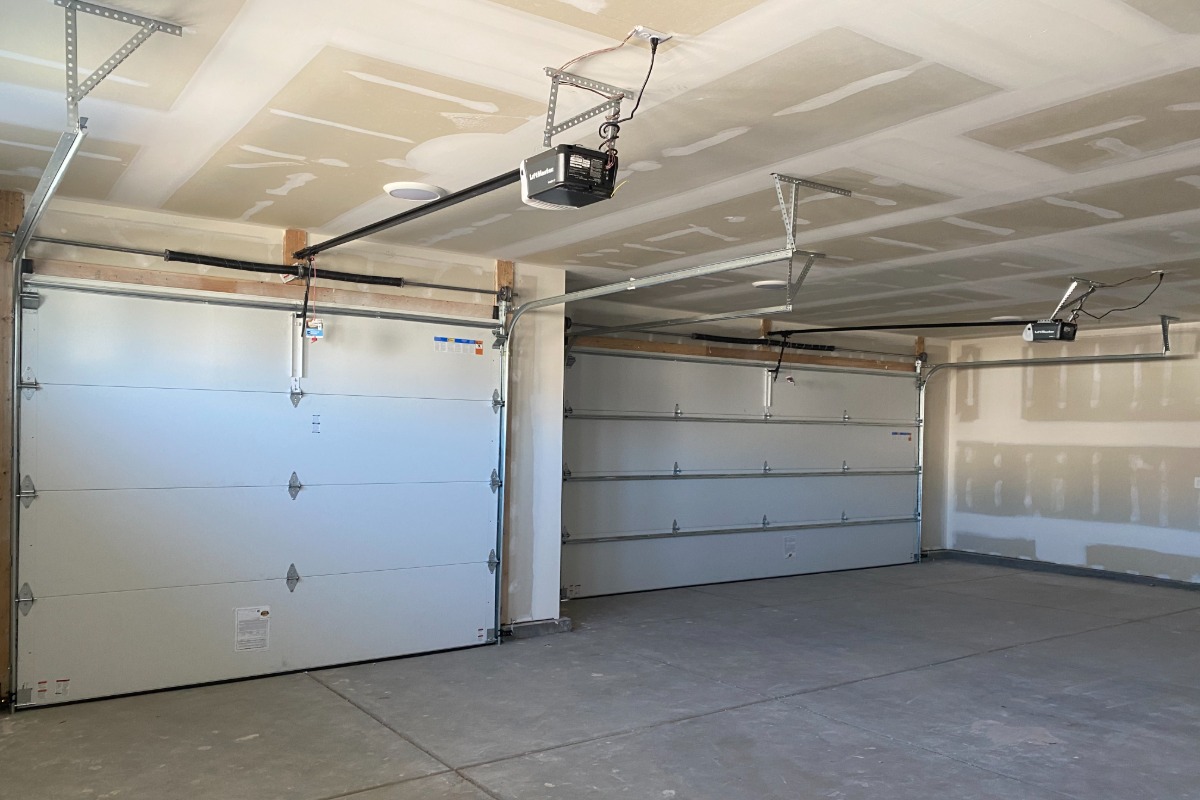
To determine whether your garage door uses torsion springs or extension springs, you can visually inspect the setup. Look for either a long, horizontal spring mounted above the door (torsion spring) or two vertically mounted springs on either side of the tracks (extension springs).
If you’re unsure or unable to identify the spring type visually, consult your garage door’s user manual or contact a professional technician. They can help you determine which type of spring your garage door requires.
On the other hand, identifying the correct spring type is crucial, as using the wrong one can be dangerous. Using extension springs on a garage door designed for torsion springs, or vice versa, can lead to improper functioning and even potential accidents. It’s important to prioritize safety and seek professional guidance if unsure about the type of spring you have.
Understanding your garage door spring type will enable you to make informed decisions when it comes to repair and replacement. This knowledge is vital for ensuring the successful repair of your garage door spring.
Essential Tools for Garage Spring Repair
When embarking on a DIY garage spring repair, it’s important to have the right tools at your disposal. Here are some essential tools you’ll need for a successful repair:
- Safety Glasses and Gloves: Protecting yourself is crucial during any repair, and safety glasses and gloves will shield you from potential hazards.
- Adjustable Wrench: This versatile tool is essential for loosening and tightening bolts during the repair process.
- Socket Set: A socket set with various sizes will come in handy when working with different fasteners.
- Vise Grips: These locking pliers will help secure parts in place while you work on them.
- Cordless Drill: A cordless drill makes it easier to remove and install screws quickly.
- Measuring Tape: Accurate measurements are necessary for proper installation of the spring, so having a measuring tape will be invaluable.
- Ladder or Step Stool: Depending on the height of your garage door, having a ladder or step stool will aid in reaching parts that are out of reach.
Gathering Your DIY Repair Kit
Before diving into the process of repairing your garage door spring, it’s crucial to gather all the necessary materials and supplies for your DIY repair kit. Having everything readily available will save you time and frustration during the repair process.
- Replacement Springs: Measure your existing springs carefully and purchase replacement springs that match the size and specifications needed for your particular garage door.
- Safety Cables: Safety cables run through the extension springs and prevent them from becoming dangerous projectiles if they were to break.
- Winding Bars: These bars are used to wind and unwind torsion springs safely, so make sure to have the appropriate size and quantity.
- Replacement Fasteners: Check if any bolts, nuts, or screws need to be replaced during the repair. Having extras on hand ensures a smooth process.
- Lubricant: Lubricating moving parts, such as hinges and rollers, is crucial for smooth operation of the garage door. Choose a lubricant specifically designed for garage doors.
- Safety Instructions and Guides: Make sure to familiarize yourself with safety instructions provided by the manufacturer or reputable sources before starting the repair process.
For example, you can gather all the materials and supplies in a designated toolbox or container so that everything is easily accessible when needed.
The DIY Garage Spring Replacement Process
Repairing a garage door spring can be a challenging task, but with the right knowledge and tools, it is possible to tackle it as a DIY project. Before diving into the process, it’s important to ensure you have a good understanding of the components involved and take necessary safety precautions. A successful DIY garage spring replacement requires patience, attention to detail, and careful execution.
Step-by-step Guide to Spring Replacement
- Safety First: Begin by disconnecting the power supply to the garage door opener and securing the door in the open position with clamps or vice grips. Also, remember to wear safety goggles, gloves, and other protective gear throughout the process.
- Identify Spring Type: Determine whether your garage door has extension springs or torsion springs. Extension springs run parallel to the tracks on both sides of the door, while torsion springs are located horizontally above the door opening.
- Measurements and Ordering: Accurately measure the length and diameter of your broken spring to ensure you order the correct replacement. Keep in mind that garage door springs are under high tension and can cause serious injury if mishandled.
- Release Tension: For torsion spring replacement, use winding bars inserted into the winding cone on each end of the spring to release tension gradually. Follow manufacturer guidelines or seek professional guidance for this step if needed.
- Remove Old Springs: Once tension is released, carefully remove the old springs from their brackets or cones using appropriate tools and techniques. Be cautious, as they can still retain some residual tension.
- Install New Springs: Install new springs by following reverse steps of removal. Make sure they are securely attached and properly aligned with the door and hardware.
- Test and Adjust: Reconnect the power supply, remove clamps or vice grips, and test the functionality of your newly replaced springs. Observe the door’s movement, balance, and any unusual noises. Make necessary adjustments to ensure smooth operation.
- Regular Maintenance: Regularly inspect your garage door springs for signs of wear or damage. Implement a maintenance routine that includes lubrication and occasional tightening of hardware to prolong the lifespan of your springs.
Remember, DIY projects come with their risks, and working with garage door springs can be potentially dangerous. If you are not confident in your abilities, it is always recommended to seek professional assistance for your safety and to ensure proper installation.

Knowing When to Call a Professional
Imagine you’re in the middle of fixing your garage door spring, feeling confident with your DIY skills. However, it’s important to know when it’s time to call in a professional for help. While tackling minor issues on your own can save you money, some situations require the expertise of a trained technician who can ensure safe and effective repairs. So, how do you know when it’s time to throw in the towel and seek professional help?
It’s important to assess the complexity of the repair and consider your own skill level. If you have experience working with garage doors and are comfortable handling simple repairs like lubricating hinges or tightening loose screws, then there’s no harm in attempting those tasks yourself. However, certain situations demand specialized knowledge and equipment that only a professional can provide.
Situations That Require Professional Help
Although DIY projects can be fulfilling, attempting complex garage door repairs without the necessary expertise can lead to costly mistakes and even pose safety risks. Here are some common signs that it’s best to call a professional for help:
- Torsion Spring Replacement: Torsion springs are tightly wound coils under high tension and can be extremely dangerous if mishandled. It is strongly recommended to leave their replacement or adjustment to professionals with the proper tools and knowledge.
- Cable Repair or Replacement: Garage door cables play a crucial role in supporting the weight of the door. If they become frayed or break, it is best left to professionals who can safely handle cable repair or replacement.
- Track Misalignment or Damage: Proper tracking is essential for the smooth operation of the garage door. If you notice track misalignment or damage, it’s advisable to let a professional assess and repair the issue to prevent further damage.
- Opener Malfunctions: If your garage door opener is not functioning properly or shows signs of wear and tear, it’s wise to consult a professional. They can diagnose the problem accurately and either repair or replace the opener as needed.
Remember, safety should always be the top priority when dealing with garage door repairs. It’s essential to recognize your limits and know when to seek professional assistance.
Final Words
As you embark on the adventure of DIY garage door spring repairs, Powell Garage Doors stands by to be an invaluable source of guidance and support if things get tough. We take pride in helping homeowners gain knowledge and provide professional assistance when necessary. Powell Garage Doors takes a holistic approach that guarantees your DIY efforts are supported by professional expertise. We provide professional-grade solutions when your task requires it. Contact us to deliver superior spring fixing at every turn and be part of an empowering DIY experience backed up with reliable professional expertise. We are your one-stop shop for garage door solutions!


0 Comments